

How to Cook Chicken Legs on the Grill: A Step-by-Step Guide for Perfect Grilled Chicken

Grilling chicken legs is one of the best ways to achieve crispy, juicy, and flavorful results every time. Whether you’re hosting a barbecue or just cooking for yourself, cooking chicken legs on the grill offers a smoky flavor and a satisfying texture that’s hard to beat. However, getting the perfect chicken leg isn’t always as simple as throwing it on the grill. There are some key techniques and tips to ensure your grilled chicken legs turn out tender and flavorful.
In this post, we’ll cover everything you need to know about how to cook chicken legs on the grill, including preparation, grilling methods, cooking times, and some handy tips to help you get that perfect crispy skin and juicy meat. Let’s dive in!
Why Choose Chicken Legs for Grilling?
Chicken legs are one of the most versatile cuts of meat for grilling. Unlike chicken breasts, which can dry out quickly, chicken legs have a bit more fat, which helps them stay moist and tender during grilling. Additionally, the bone-in design helps retain the natural flavors, making it a popular choice for grilling.
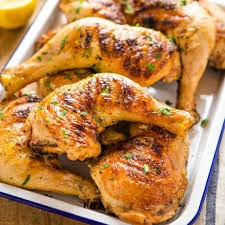
Grilling chicken legs also allows you to achieve a beautiful combination of crispy skin and juicy meat, which is a hallmark of a great grilled chicken dish. Whether you're grilling them for a family dinner or a large get-together, cooking chicken legs on the grill will elevate your meal.
Preparing Chicken Legs for the Grill
Before you can start grilling, there are a few important steps to take when preparing chicken legs for the grill. Here’s what you need to do:
1. Pat the Chicken Dry
First, it’s essential to remove any excess moisture from the chicken legs. Use paper towels to pat them dry. This will help the skin crisp up during grilling and prevent the chicken from steaming instead of grilling.
2. Season the Chicken Legs
Seasoning is one of the most important steps in making sure your grilled chicken legs are full of flavor. You can either use a simple dry rub or marinate the chicken legs for extra flavor.
Dry Rub: A simple dry rub made from salt, pepper, garlic powder, paprika, and other spices will create a flavorful crust on the chicken. Rub it evenly over the chicken legs, ensuring they’re coated all over.
Marinade: If you prefer a more intense flavor, marinate the chicken legs for at least 30 minutes or up to 2 hours. A marinade with olive oil, lemon juice, garlic, herbs, and spices can infuse the chicken with moisture and flavor.
3. Oil the Grates
Before grilling, lightly oil the grates with a paper towel dipped in vegetable oil. This prevents the chicken from sticking to the grill and ensures a smoother cooking process.
The Right Grill Setup
The key to cooking chicken legs on the grill is setting up the grill properly. There are two main grilling techniques you should be aware of: direct and indirect heat.
Direct Heat: This is where the chicken is placed directly over the flame. This method is ideal for searing the chicken skin and giving it that crispy texture.
Indirect Heat: For cooking the chicken through without burning the outside, you’ll want to move the chicken legs to a cooler side of the grill, away from the direct heat. This allows the chicken to cook slowly and evenly without overcooking the outside.
To set up your grill for chicken legs:
If using a gas grill, preheat it to medium-high heat (around 375°F or 190°C). Turn one side of the grill to high heat and leave the other side off for indirect cooking.
If using a charcoal grill, arrange the hot coals on one side to create a two-zone fire. The direct heat will be on one side, and the indirect heat will be on the other.
Step-by-Step: How to Cook Chicken Legs on the Grill
Now that you’ve prepared the chicken and set up the grill, it’s time to start cooking. Here’s the step-by-step process for cooking chicken legs on the grill:
1. Sear the Chicken Legs
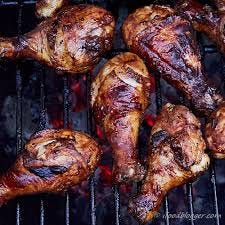
Start by placing the chicken legs on the grill over direct heat. Grill the legs for 5-7 minutes on each side to create a crispy, golden-brown crust. Be sure to keep the lid closed to trap heat and allow the chicken to cook evenly.
During this stage, keep an eye on the chicken to prevent flare-ups. If the skin starts to blacken too quickly, move the chicken to the cooler side of the grill (indirect heat) to avoid burning.
2. Move to Indirect Heat
Once the chicken legs have a nice sear on the outside, move them to the indirect heat zone of the grill. This allows the chicken to cook through without burning. Close the lid and let the chicken legs cook for 20-30 minutes, turning them every 5-7 minutes to ensure even cooking.
3. Check for Doneness
The best way to check if your chicken legs are done is by using a meat thermometer. Insert the thermometer into the thickest part of the chicken leg, avoiding the bone. The chicken is done when it reaches an internal temperature of 165°F (74°C).
If you don’t have a meat thermometer, you can also check for doneness by cutting into the thickest part of the chicken and ensuring the juices run clear, not pink.
4. Crisp the Skin
If you want extra crispy skin, move the chicken legs back over to the direct heat for an additional 2-3 minutes per side. This will help crisp up the skin even more.
Tips for Perfect Grilled Chicken Legs
Avoid Overcrowding the Grill: Make sure there’s enough space between the chicken legs to allow for proper airflow. Overcrowding the grill can lead to uneven cooking and lower quality results.
Use a Meat Thermometer: A meat thermometer is the most accurate way to check the internal temperature of the chicken and avoid undercooking or overcooking.
Let the Chicken Rest: After removing the chicken from the grill, let it rest for 5-10 minutes. This helps the juices redistribute and makes for a juicier, more flavorful result.
Experiment with Marinades and Rubs: Don’t be afraid to try different seasonings, rubs, or marinades. From smoky BBQ flavors to tangy citrus, there are endless ways to customize your grilled chicken legs.
Creative Sides to Pair with Grilled Chicken Legs
Once you’ve perfected cooking chicken legs on the grill, it’s time to think about the sides. Here are some great options that pair wonderfully with grilled chicken legs:
Grilled Vegetables: Vegetables like corn, bell peppers, and zucchini complement grilled chicken legs perfectly.
Coleslaw: A creamy, tangy coleslaw adds a refreshing contrast to the richness of grilled chicken.
Potato Salad: A traditional potato salad is a crowd-pleasing side that pairs well with the smoky flavors of grilled chicken.
Rice or Quinoa: A light rice or quinoa dish can help balance the richness of the chicken legs while providing a satisfying meal.
Conclusion
Cooking chicken legs on the grill is easy and rewarding, and with the right preparation, grill setup, and techniques, you can achieve delicious, juicy, and crispy chicken every time. Whether you prefer a simple dry rub or a more complex marinade, grilling chicken legs is a versatile and satisfying way to cook. With a few key tips and a little practice, you’ll be able to master the art of grilling chicken legs like a pro.
For more grilling tips, recipes, and expert advice, be sure to check out Scrappy Geek. Happy grilling!